 by
by Sanding Block: Achieve flawless results with the must-have finishing tool
Introduction
Sanding is one of the most common finishing operations done in woodworking, furniture making, auto body repair and other industries. It is a process of smoothing rough surfaces and providing a clean and uniform finish to the workpiece. Sanding hinders are an indispensable sanding tool that helps achieve consistent and precise sanding results.
What is a Sanding block?
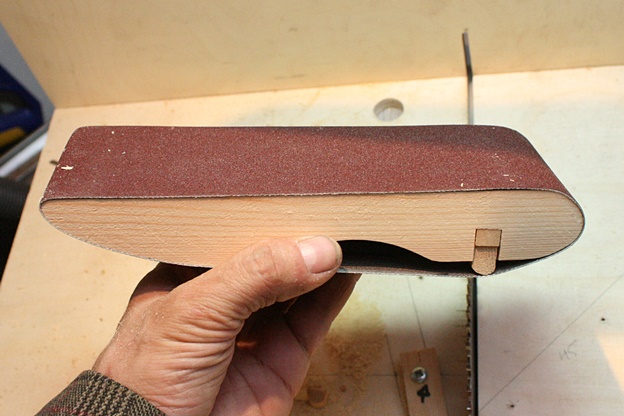
A Sanding hinder is a rectangular or square shaped wooden or hard rubber block with sandpaper attached to one or both sides. It provides a solid backing and grip area for sanding across flat or contoured surfaces efficiently. The key features of a Sanding hinder include:
– Sturdy construction: Sanding hinders are usually made of wood like maple or MDF or durable synthetic material like rubber. This provides strength and durability for repeated sanding.
– Flat or contoured faces: Blocks come with flat faces for general sanding or shaped sides like cylindrical or arched faces to sand intricate shapes.
– Sandpaper attachment: Most blocks have self-adhesive backs or slide-in slots to securely hold sandpaper in place during sanding motions.
– Comfortable non-slip grip: Ergonomic designs with rounded edges and anti-slip rubberized surfaces ensure a firm grip and control during prolonged use.
– Compact size: Sanding hinders have compact dimensions ranging from 3×4 inches to 6×9 inches for convenient sanding in tight spaces.
– Variety of grits: Blocks can be used with a range of sandpaper grits from coarse to fine for different stages of the sanding process.
Advantages of Using a Sanding hinder
Some key benefits of using a Sanding hinder over loose sandpaper include:
– Consistent pressure: The rigid backing of a block allows for consistent downward pressure application without gouging the workpiece.
– Precise control: The block aids in keeping the sandpaper flat against the surface for an even sanding effect in straight lines or curves.
– Smoother finishes: Sanding with a block produces smoother sanded surfaces with fewer scratches compared to uncontrolled sanding by hand.
– Easier sanding: The block supports long sanding sessions by reducing hand fatigue compared to individual sheets of sandpaper.
– Less dust: Sanding hinders create less airborne dust as the paper conforms closely to the board or item being sanded.
– Time saving: Blocks speed up sanding when switching between grits as sandpaper changes are fast with adhesive or slide-in designs.
Popular Types of Sanding hinders
Flat Block
The basic flat Sanding hinder is the most commonly used style. Its flat rectangular shape makes it ideal for sanding flat panels and surfaces. It is available in small and large sizes for different applications.
Arched Block
Arched blocks have a semi-circular or oval shape suited for sanding concave edges, inside corners and contours smoothly. They typically feature softer rubber construction.
Contour Block
Contour or profile blocks have custom shapes machined into the face for sanding intricate profiles exactly. Common profiles include half-rounds, coves and ogees useful for decorative moldings.
Sponge Back
A newer design with an open-cell sponge backing allows the paper to contour perfectly to any shape. It reduces pressure point scratches and provides extra cushion for delicate jobs.
Disc Block
Disc or wheel shaped pads attach to rotary tools for rapid sanding of large flat areas. Useful for drywalling, auto body repair and wood floor sanding tasks.
Choosing the Right Sanding hinder
Successful sanding depends on using the appropriately sized block for each job. Consider material, size, shape and intended use while selecting blocks. Start with coarse grits in larger blocks then switch to finer grits and smaller blocks for detailed work. Rubber and soft foam backed blocks minimize scratches on delicate surfaces. Have a variety of block styles on hand for different sanding challenges. Proper Sanding hinder selection is key to achieving flawless sanded surfaces.
Sanding Techniques for Best Results
Follow these techniques when using Sanding hinders:
– Use moderate pressure and let the abrasive do the work. Applying too much downward force will gouge the surface.
– Sand in the direction of the grain on wood for a smooth flow. Change directions lightly for an even scratch pattern.
– Take consecutive passes in overlapping strokes until the desired smoothness is achieved.
– Wipe away dust frequently to monitor progress. Replace paper when it loads up with debris.
– Finish sanding along edges with the block held at a 45° angle for cleanliness.
– Change sandpaper grit in sequence from coarse to fine typically 80-120-150-180 grits.
– Use a sanding sealer or pre-stain conditioner before staining to prevent blotchiness.
With practice of proper Sanding hinder techniques, flawless sanded surfaces can be achieved. Always use protective dust masks while sanding and vacuum up dusty debris afterwards. Attention to these details results in professional quality finishes.
In conclusion, sanding blocks are indispensable power tools in any woodworker’s shop or painter’s cabinet. Their rigid backing promotes consistent sanding pressure control for blemish-free surfaces. Choosing the right block style suited for each job and developing proper sanding techniques are keys to successfully using these sanding workhorses. With practice, anyone can achieve high quality finishing results with Sanding hinders.